Natural Light Photography Tips for Stunning Outdoor Shots
Outdoor photography is one of the most enjoyable forms of visual storytelling. Still, it wouldn't be possible if you didn't have a set of natural light photography tips to help you take the images from ordinary to extraordinary! Whether you're a hobbyist just creating family portraits or an aspiring professional, learning how light works can make a drastic difference to your images. The timing of the day for photography can make or break a picture, and having some easy sunny day photography tips under your belt can save you from nasty shadows. Learn every trick from golden hour to cloudy cover to harness natural light as your greatest asset.
The Importance of Natural Light in Outdoor Photography
Natural light is ephemeral—it moves throughout the day with limitless possibilities and obstacles. While artificial light can be arranged and controlled every inch of the way, natural light requires adaptability and awareness. Reading the angle of the light, intensity, and color will allow you to create actual images that live and breathe.
Natural light can bring out depth, texture, and accurate colors in your subjects. It lends warmth to portraits, depth to landscapes, and life to travel photography. With proper techniques, natural light photography is more than "going outside and taking pictures"—it becomes artfully creating engaging images.
The Best Time of Day for Photos
Timing is one of the key natural light photography tips. It all depends on what mood or effect you need to capture.
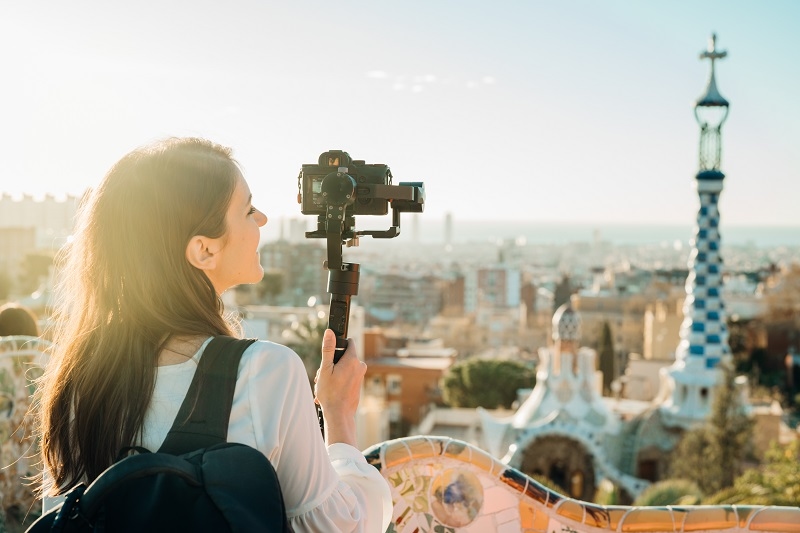
Golden hour refers to both the hour before sunset and the hour following sunrise, and it is known to be the favorite time of day by photographers worldwide. The light is warm, soft, directional, perfect for portraits, cityscapes, and landscapes. Colors are brilliant, shadows are elongated, and everything feels cinematic.
- Blue Hour: The dawn or dusk when the sky is deep blue. It's perfect for moody landscapes, city skylines, or architecture.
- Midday Light: Direct, overhead light can produce sharp shadows and highlights. While this is difficult for portraits, it can be useful when photographing active street scenes or bold black-and-white images.
- Overcast Days: Do not disrespect the cloudy sky. The light becomes diffused, even removing harsh shadows, creating a beautiful setting for portraits and product-style photography outside.
When planning a shoot, consider how your creative vision will align with available natural light. A Pittsburgh golden hour guide or any local time-based table will allow you to discover exactly when the light will be most flattering.
Beginner Outdoor Lighting: Where to Get Started
Natural light can be unpredictable when you are starting with photographic outdoor subjects, but these outdoor lighting ideas will help you take control:
- Get a Sense of Light Direction - Front lighting creates flat features and fewer shadows. Side lighting adds drama and depth. Backlighting creates soft glows or silhouettes.
- Use Reflectors - Inexpensive reflectors or even a piece of white poster board can bounce light back onto your subject and lessen shadows.
- Find Open Shade - On bright sunny days, placing your subject under an awning, an edge of a building, or a tree, will soften the light.
- Change Angles - Even slight adjustments in where your subject stands in relation to the sun can create a massive difference in how flattering the image is.
- Use Natural Backgrounds - Light surfaces like sidewalks, walls, or water reflect light naturally and can pull some of that light onto your subject.
When you practise these basic tips, you will quickly gain confidence in working with light outdoors.
Pittsburgh Golden Hour Guide: Light Classifications
Typically, you will hear photographers planning their shoots around golden hour, yet golden hour can look different depending on the season and location. A Pittsburgh golden hour guide is especially valuable for those capturing the city’s skyline, rivers, and bridges.
- Spring and Summer: Look for golden hour between 6:30 and 8:30 PM, when warm light brightens Pittsburgh's three rivers and nearby hills.
- Fall: With the sun at a lower angle, orange-red tones are added to leaves and brick buildings, so golden hour portraits are stunning.
- Winter: Shorter days mean golden hour is as early as 4:30 PM. Snow reflecting the sun can add an extra glint.
Apps such as PhotoPills or Golden Hour Calculator allow you to monitor these times in real-time easily, so you never miss the ideal light.
Natural Light Portrait Tips
Portraits are usually the most difficult but rewarding application of natural light. These natural light portrait tips can assist you in capturing flattering results:
- Employ Soft Light on Skin Tones – The diffused, soft light of golden hour or cloudy days softens skin by cutting the harsh shadows.
- Catchlights in the Eyes – Place your subject so the light bounces off their eyes, creating glints and animation in the portrait.
- Prevent Harsh Shadows on the Face—Midday light creates unflattering dark shadows under the eyes or nose; use shadows or reflectors to soften them.
- Try Backlighting – Position the sun in the background of your subject to generate a radiant outline of shoulders or hair. Employ a fill light (reflector) to illuminate the face.
- Pay Attention to the Background – Vibrant light on a competing background can distract attention. Make backgrounds harmonious and straightforward.
Implemented properly, these pointers transform average portraits into high-quality results that pass professional standards without the cost of pricey studio equipment.

Tips for Photography on Sunny Days
Sunny days are a blessing and a curse all at once. While colors look vibrant in the sun, shadows can be uncompromising. Using these tips for photography on a sunny day will help you beat high-contrast photography situations:
- Shoot in RAW – RAW format provides more flexibility for editing later, and you may recover blown highlights or some shadow detail.
- Use Lens Hoods or Your Hand to block direct sun from reaching your lens, preventing lens flare and maintaining contrast.
- Locate Half Shade—Positioning your subject at the edge of the shade will allow the background light to remain alive and, therefore, maintain the overall balance of exposure.
- Use Shadows- Use felonious shadows created by architecture, trees, or fences to create texture and shape(Patterns).
- Polarizing Filters – They diminish glare from glass or water and make skies richer in blue.
Rather than combating harsh light, accept its boldness when photographing city architecture, dramatic street action, or high-contrast landscapes.
Advanced Natural Light Photography Tips
After getting comfortable, following advanced tips can take your outdoor photography to the next level:
- Golden Hour Bracketing – Take several exposures during golden hour to record slight color and light variation.
- Silhouette Photography – Underexpose for the background, not the subject, to produce dramatic silhouettes during sunrise or sunset.
- Make Use of Natural Frames – Trees, arches, or doorways can influence the direction of the light and add depth.
- Blend Natural and Artificial Light – Tiny LED panels or flash can be mixed with natural light for greater creative control.
- Monitor Color Temperature—To get the right color balance, set your camera's white balance to similar warm or cool natural colors.
Common Mistakes to Steer Clear Of
Even veteran photographers can get caught out. Steer clear of these common mistakes:
- Ignoring Shadows: Always be aware where shadows fall, particularly on faces.
- Overexposing Backgrounds: Use exposure compensation between the subject and sky to prevent detail loss.
- Making Images in the Wrong Light: Don't take your chance with midday sun; plan for the best time of day to capture pictures.
- Not Preparing your Equipment: Can you imagine leaving the lens hood behind, or forgetting a reflector or a filter? While this may limit what you can do in a field, it is never a complete stoppage.
- Standing your Ground: Instead of standing and being subject, you can choose to move the subject, change your angle, and adjust to the light rather than force it.
Conclusion: Mastering Natural Light for Beautiful Photos
Photography and light go hand-in-hand, and natural light is the best tool you'll ever have! Mastering natural light by using the natural light photography tips you learned above, and practicing during the best time of day for pictures, using some natural light portrait tips, and incorporating some sunny day photography tips will give you complete control over the outdoor lighting. Whether you're on your pathway to creating your personal Pittsburgh golden hour guide or simply pursuing your creative vision in your own backyard, the goal is to keep practicing and applying what you learned and let the light lead you to more amazing photos and more creativity!
Mastering natural light will not only change how you photo, it will change how you see the world in front of the camera!
This content was created by AI